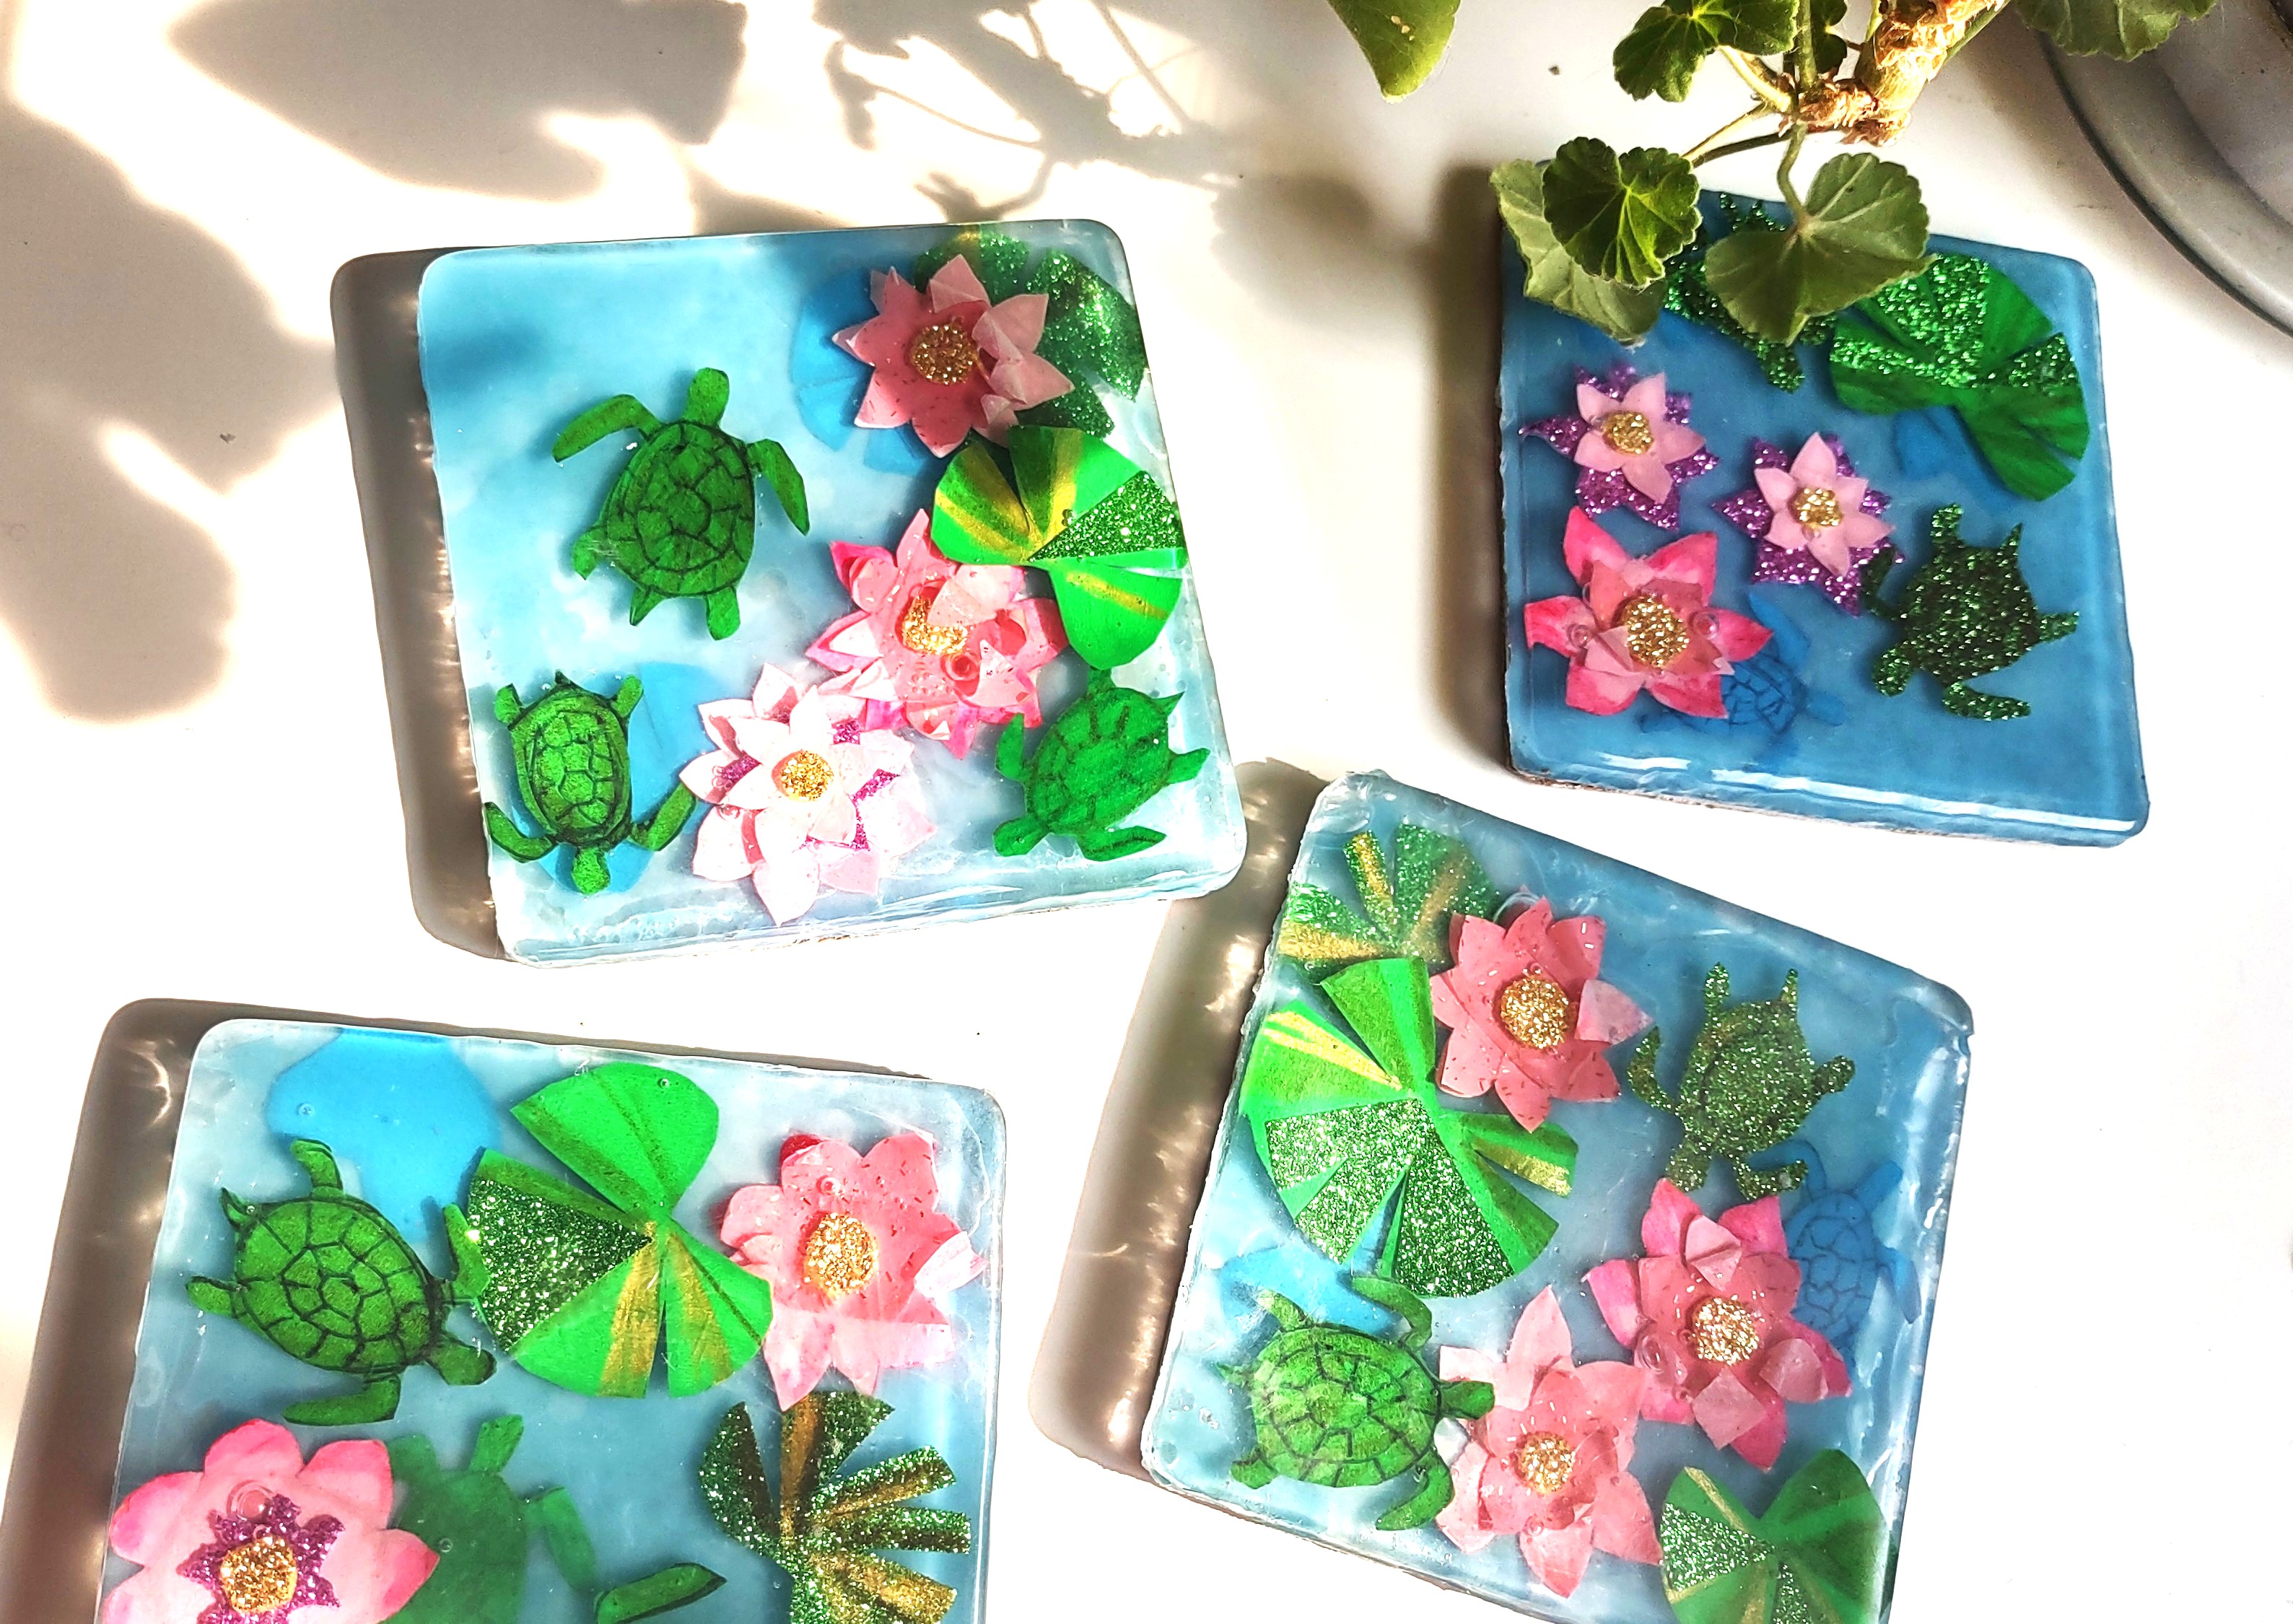
In my previous posts, I shared about the coasters that I have been crafting using epoxy resin. My newest work is on the theme of waterlily ponds with turtles. The images below show some examples of these series of work that you can also find in the “Products” page of our website, “dobroandvita.com” among many other coaster designs crafted in our studio.

Spiritual and Artistic Inspirations
I am sure you know that both waterlilies and turtles are rich with meaning and ancient spiritual depth in many cultures, and both are very sacred. In Buddhism, waterlilies or lotus flowers are symbols of spiritual awakening and enlightenment.

Turtles are also incredible creations, and their imagery is associated with rich cultural and spiritual meanings in many cultures around the world. For this reason, I don’t think I can do justice to this theme in a few paragraphs in a blog post. As someone who lives in Canada and North America, I am well aware of the significance of the turtles in Indigenous cultures, including the Anishinaabe Culture. One of the greatest books I have ever read is by Dr. Robin Wall Kimmerer, and is titled “Braiding Sweetgrass: Indigenous Wisdom, Scientific Knowledge and the Teachings of Plants“. In this book, Dr. Wall Kimmerer shares with us deep spiritual, cultural, and scientific insights about the significance of nature and amazing creations such as turtles.

As a Fine Arts graduate, I believe art uncovers its meaning through the lens of the viewer, shifting across different perspectives. For this reason, I share only my personal connection to the theme rather than imposing a definitive interpretation. My perception of these visual elements is deeply rooted in my meditation and yoga practices, which have been shaped by the transformative teachings of guides like Eckhart Tolle and Michael Singer.

As I shared in an earlier post, I discovered that epoxy resin—despite its chemical challenges—has a unique potential to highlight “stillness.” Anyone familiar with Eckhart Tolle’s teachings knows the vital importance of accessing that state of deep presence. Though, to be completely honest, I doubt Eckhart himself would seek stillness in synthetic resin. The wonderful, unique person he is would likely prefer a quiet walk in nature instead!

“Stillness is the language God speaks, and everything else is a bad translation.”
Eckhart Tolle, A New Earth
As an open-minded Christian, I believe that the perspectives offered by different spiritual traditions do not contradict one another; instead, they beautifully complement each other. For instance, the Buddhist concept of spiritual awakening, symbolized by the lotus flower, aligns perfectly with the teachings of Jesus. It powerfully reminds me of Easter Sunday, rebirth, and baptism. Fostering a peaceful dialogue and exchanging insights between secular and non-secular traditions is not just valuable—it is essential for global peace.

The Process Steps
Our new coasters are made with silicone molds that I made using special mold-making resin and wood models.
Here is an example of one of the square molds I made with Alumilite Amazing Mold Maker that I purchased from Michaels Arts and Crafts store (www.michaels.com). The original color of the silicon molds by this brand in Michaels store is red.

Listed below are some of the steps involved in the craft-making process of making resin coasters with extra backing layers:
1-Crafting the lotus flowers, lily pads, and turtles with paper cutouts.

2-Further decorating and enhancing the design of the paper ornaments with paint and decorative craft materials.

3-Preparing the resin using a 1:1 ratio of epoxy resin and hardener. that are fully mixed to reach a homogenous cloudy mix that will clear later. I used the Clear Cast Epoxy brand that I purchased from the Michaels Arts and Crafts store. The amount of resin to cast depends on how many molds you want to fill, or in other words, how many coasters or tiles you are planning to make.

4-Pouring the first epoxy layer from the mixture in equal amounts into each of the molds. While wearing protective gloves, use the edge of a toothpick to remove visible bubbles and make sure that in each mold, there is a layer of resin that is clear and clean.

5-Embedding the paper cutout ornaments in the molds, face down. This step requires some hands-on experience to realize how much resin to pour in the first layer. Since I like the 3D effect of the paper flowers to show, I let them float a bit with some extra resin. Let this first layer set to a sweet spot stage when the resin is set and feels solid under touch, but is a bit sticky or gummy like. If you reach this stage, you can pour the next layer without needing to sand the surface.
6-Add a few more of the paper ornaments to complete your 3D designs over the solid and sticky surface of the previous layer, and then cast the next batch of resin. In this stage, I added a little blue color to my resin mix.

7-For this final layer, which during the process of filling the molds would be the upper layer, I share my secret for creating a sense of depth illusion in the pond. I have to say I am not always this generous in sharing my crafting secrets (LOL), so you are lucky today. Here we go: For the last layering of paper cutout ornaments, I used blue color for the lily pad leaves and turtles.

This is based on a painting lesson that I learned in a watercolor class during my Fine Arts education. Adding cooler colors to the shapes makes them be perceived by our eyes as located in the far back. Also, for my final resin layer, I added more blue color pigments.
8-Allow time for this final layer to reach a solid and sticky stage. If you want the coasters to be without a backing as a resin-only layer, then you can let the layers fully set for complete solidification. I normally like to attach a backing paper after the last layer is set to a sticky stage and then let the resin layers fully solidify before demolding.
9-I usually try not to rush the removal of the molds and give them a few hours. This time frame depends on many factors, including the brand of the epoxy resin, thickness, temperature, and mold shape.
10-Removing the silicone molds after complete resin solidification. I always add two more layers to the solid resin coaster pieces.


Once the resin cures completely, I apply a high-quality clear silicone adhesive to attach a custom-cut, 3mm-thick vinyl foam layer. To ensure the final piece is perfectly gentle on your furniture, I add a premium backing of self-adhesive cork sheet. I typically source these reliable materials locally from Home Hardware or Canadian Tire, though excellent rolls of foam and adhesive cork are widely available at most hardware suppliers regardless of your location.


Here are images of another set of 4 coasters that I made using the process and theme described above.

Closing this blog post with a gentle and friendly reminder:
As I have mentioned in an earlier post, working with epoxy resin requires wearing protective gear such as a chemical protection mask, gloves, and protective goggles. Please take your safety very seriously if you are planning to make crafts with this medium.
Namaste!
Wishing you health, goodness, and joy of life!

Leave a Reply